 code前端网
Laravel5.6+CentOS7.6+Lnmp1.5+Vue6.9+Node10.15项目开发记录
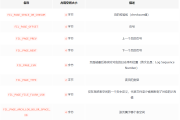
系统环境、软件版本等
,,.
安装lnmp时,由于laravel项目的需要,安装了NGINX。具体安装步骤请查看官方网站。
Composer 默认安装。如果没有,可以使用以下方法:
cd /tmp
curl -sS https://getcomposer.org/installer | php
使用常用命令,使用以下方法:
composer sudo mv composer.phar /usr/local/bin/composer
为了和谐原因更换镜像:
composer config -g repo.packagist composer https://packagist.phpcomposer.com
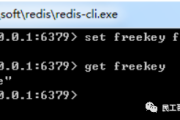
lnmp默认不安装Redis。可以看到Redis安装完毕。
项目安装步骤
1.下载LARAVEL项目的源代码。源代码为《基于laravel框架的响应式企业自由职业者crm php源码下载》并将源代码复制到您网站的www目录下,如/home/wwwroot/crm
2、Nginx配置,在中新建文件/usr/local/ nginx/conf/vhost,编辑内容如下:
server
{
    listen 8080;
    server_name localhost;
    index index.html index.htm ;
    root  /home/wwwroot/crm/public;

    location / {
        try_files $uri $uri/ /$query_string;
    }

    location ~ [^/]\.php(/|$) {
        include fastcgi_params;
        fastcgi_pass  unix:/tmp/php-cgi.sock;
        fastcgi_index ;
        fastcgi_param SCRIPT_FILENAME $document_root$fastcgi_script_name;
    }
}
2、项目文档权限:使用以下命令:
sudo chown -R www:www /home/wwwroot/crm
sudo chmod -R 775 /home/wwwroot/crm/storage
sudo chmod -R 775 /home/wwwroot/crm/bootstrap/cache
3、定义项目。 env配置文件:需要编辑以下绿色项目。填写您的信息:
APP_NAME=BSCRM
APP_ENV=production
APP_KEY=base64:JJApzgaAiigyAdn0lErEX7Yd2Ej9v9fCDen7raRMU5g=
APP_DEBUG=falseAPP_URL=http://localhost:8080
APP_LOCALE=en
LOG_CHANNEL=stack

DB_CONNECTION=mysql
DB_HOST=127.0.0.1
DB_PORT=3306
DB_DATABASE=crm
DB_USERNAME=root
DB_PASSWORD=bspw@2019

BROADCAST_DRIVER=log
CACHE_DRIVER=file
SESSION_DRIVER=file
SESSION_LIFETIME=120
QUEUE_DRIVER=sync

REDIS_HOST=127.0.0.1
REDIS_PASSWORD=null
REDIS_PORT=6379

MAIL_DRIVER=smtp
MAIL_HOST=smtp.qq.com
MAIL_PORT=25
MAIL_USERNAME=2850852165@qq.com
MAIL_PASSWORD=xzg@007
MAIL_ENCRYPTION=BSCRM

PUSHER_APP_ID=
PUSHER_APP_KEY=
PUSHER_APP_SECRET=
PUSHER_APP_CLUSTER=mt1

MIX_PUSHER_APP_KEY="${PUSHER_APP_KEY}"
MIX_PUSHER_APP_CLUSTER="${PUSHER_APP_CLUSTER}"
4。运行安装
php artisan flow:install
此命令将运行 php artisan key:generate、php artisan migrate。
如果是新项目安装(无源代码),可以使用以下方法:
- 在空项目文档 /home/wwwroot/newproject 目录中运行命令composer install
- 完成后,运行 php artisan key:generate 生成密钥
- 命令 php artisan migrate 迁移数据库
- 命令 php artisan up online
5,计划任务
crontab -e
* * * * * php /home/wwwroot/crm/artisan schedule:run >> /dev/null 2>&1
crontab -e
* * * * * php /home/wwwroot/crm/artisan schedule:run >> /dev/null 2>&1
0.4 0.4 这通常是nginx 配置错误例如 URL 重写,要修复导致的错误,您可以查看以下内容:
如果 Web 服务器是 Apache,则在 /home/wwwroot/crm/public/ 中创建一个新的 .htaccess 文件并进行如下编辑: Options +FollowSymLinks
RewriteEngine On
RewriteCond %{REQUEST_FILENAME} !-d
RewriteCond %{REQUEST_FILENAME} !-f
RewriteRule ^ [L]
如果 Web 服务器是 Apache,则在 /home/wwwroot/crm/public/ 中创建一个新的 .htaccess 文件并进行如下编辑:
Options +FollowSymLinks
RewriteEngine On
RewriteCond %{REQUEST_FILENAME} !-d
RewriteCond %{REQUEST_FILENAME} !-f
RewriteRule ^  [L]
如果 Web 服务器是 Nginx。 nginx 配置文件必须包含以下条目:
location / {
    try_files $uri $uri/ /$query_string;
}
2。 CentOS7启动后网络异常。观察到/etc/sysconfig/network-scripts/ifcfg-eth0配置文件不存在,只有ifcfg-lo配置文件。不用担心。 ,如果是,则指定eth0文件。如果没有,只需指定lo配置文件即可。请注意更改如下:ONBOOT=no 变为 ONBOOT=yes
3。更改设置后记得重新启动 nginx 和 php-fpm
4。更多更多参考:laravel php artisan 数据库操作
1. 利用php artisan 对mysql基本操作

(1).使用Artisan命令make:migration来创建一个新的迁移:
  eg:  php artisan make:migration create_users_table

(2).运行迁移
  eg: php artisan migrate
  强行迁移 : php artisan migrate --force

(3).回滚迁移
  想要回滚最新的一次迁移”操作“,可以使用rollback命令,注意这将会回滚最后一批运行的迁移,可能包含多个迁移文件:
  php artisan migrate:rollback
  migrate:reset命令将会回滚所有的应用迁移:

(4).在单个命令中回滚/迁移
  php artisan migrate:refresh

  //结构数据同时迁移
  php artisan migrate:refresh --seed

(5).重命名/删除表
  重命名:$from  原表名   ||   $to   新表名
      Schema::rename($from, $to);

  删除表:$table  表名
      Schema::drop($table);
      Schema::dropIfExists($table);

(6).创建列/及其列修改
  使用Schema门面上的table方法
  eg:  Schema::table('users', function ($table) {
	    $table->string('email');                                          //创建列
	    $table->string('description')->nullable()->after('title');        //指定添加位置
	    $table->drop.$indexName($filedName);                              //删除索引
	    $table->foreign('user_id')->references('id')->on('users');        //外键约束
	    $table->dropForeign('posts_user_id_foreign');                     //删除外键

	    " 注意:删除指定的列。请记住任何与该列关联的索引也将被删除。";
	    $table->dropColumn('email');                                      //删除列
	    $table->dropColumn('email', 'avatar', 'location');                //删除多列
	    $table->string('email', 50)->nullable()->change();                //修改属性

	    " 注意:enum类型的列的重命名暂不支持。";
	    $table->renameColumn('email', 'emails');                          //重命名列
	});

(7).清除表时先忽略外键约束
   DB::statement('SET FOREIGN_KEY_CHECKS=0;');
   App\User::truncate();
   DB::statement('SET FOREIGN_KEY_CHECKS=1;');

(8).删除枢纽表的关联数据使用detach
   eg: User::find(1)->roles()->detach();

  //添加字段名
(9).  php artisan make:migration add_要添加的字段名_to_要添加字段的表名_table --table=要添加字段的表名

  //修改字段名
(10). 修改原有字段属性  php artisan make:migration change_要修改的字段名_on_要修改字段的表名_table --table=要添加字段的表名。
版权声明
本文仅代表作者观点,不代表Code前端网立场。
本文系作者Code前端网发表,如需转载,请注明页面地址。
相关文章


作者文章
- 用小程序学英语到底有没有用?适合哪些人?避坑指南加靠谱用法有吗? 3周前 (05-22)
- 2024-2025做通用和本地生活小程序没人看没人下单怎么办?试试这6个小成本留客转化型技巧 3周前 (05-22)
- 做小程序英文翻译避不开哪些坑?怎么翻才能吸引海外用户留存? 4周前 (05-21)
- Vue3 Composition API watch开启deep后踩过哪些坑?如何高效用它处理深层数据监听? 4周前 (05-19)
- Vue3中watch监听props时,deep:true到底该不该随便开? 4周前 (05-19)